How to use Infatica Residential Proxies on iPhone
info
Once you have created a proxy list in Infatica, you can use proxies on your iOS device
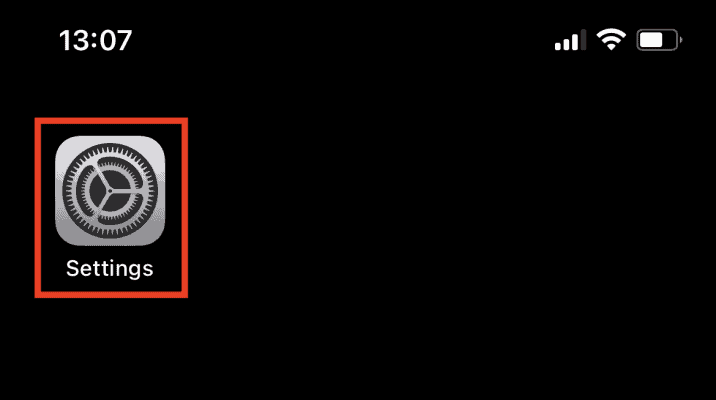
Open your iPhone Settings.
- Go to your device settings
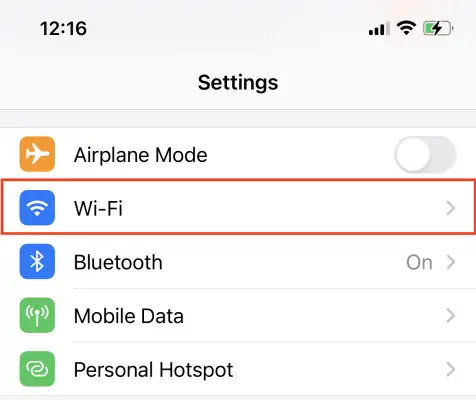
Wi-Fi Settings
- Select Wi-Fi.
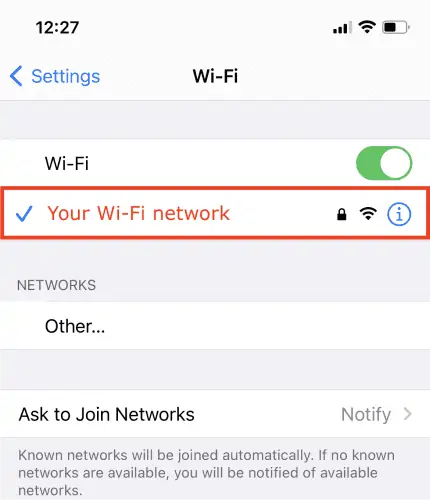
Select current Wi-Fi
- Select the Wi-Fi network you’re connected to. It will have a blue checkmark on the left.
caution
Please note that you need to add a Wi-Fi proxy configuration for each Wi-Fi network – even if you’re switching between different frequencies (e.g. 2.4 GHz → 5 GHz) within your own network.
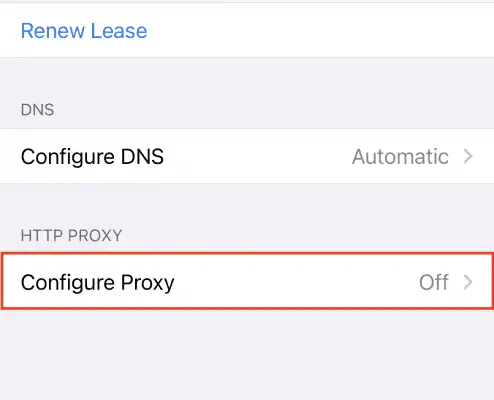
Configure Proxy
- At the bottom of the page, under HTTP Proxy, select Configure Proxy.
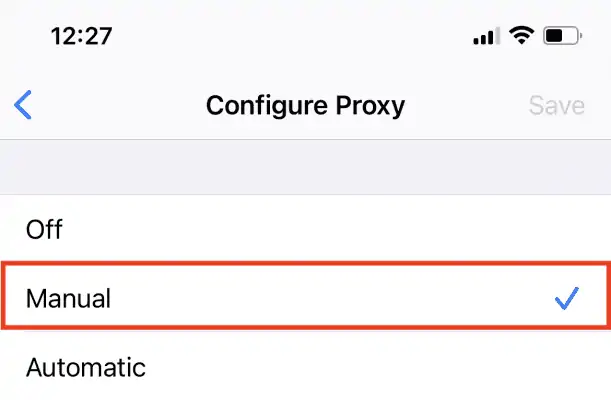
Manual Configuration
- Then select Manual Configuration.
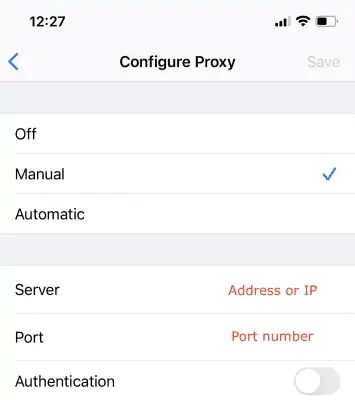
Proxy settings
- Enter your proxy server’s settings.
info
In the Server field, copy and paste the IP address from the proxy list; in the Port field, paste the port copied from the proxy list.
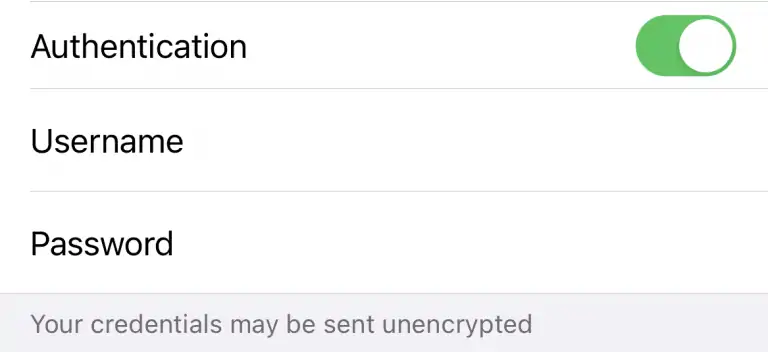
Username and Password fields
- Copy the login and password values from the proxy list – and paste them into the Username and Password fields.
Congratulations:
That’s it! You’ve successfully set up a proxy server on your iOS device!
note
Note that iOS won’t let you set up a SOCKS5 proxy server through the settings. This works only for HTTP(S) proxies.
Then we can open https://ip-api.com/ and check if everything is working correctly.
Disable proxy
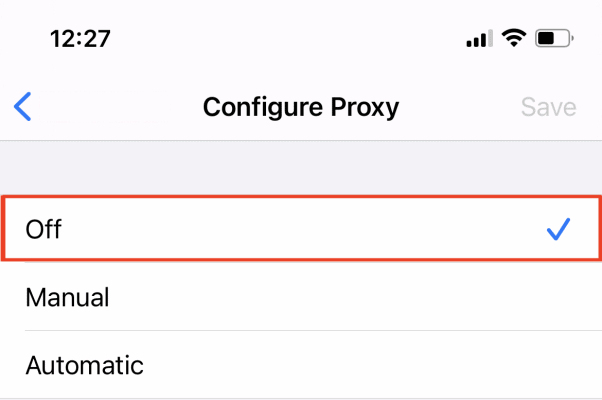
- To disable proxy, go back to the proxy configuration. Then simply select Off. A blue check mark should appear on the right.
