
Proxies improve your web security and solve various connection problems. With web browsers as (arguably) the most important productivity tool, it makes sense to try and enhance your browsing experience with proxies.
In this article, we’ll take a closer look at the benefits that a proxy for Chrome offers and various methods of installing it in Google Chrome.
How to change proxy settings in Chrome
Chrome proxies are simply integrated into your Google Chrome instance. Proxies are typically installed via certificates – special files that apply the proxy settings on a system-wide level; a Chrome proxy, on the other hand, is limited to a web browser, which some users find more convenient.
Set proxy in Chrome via system settings
Let’s start by opening Chrome settings from the browser toolbar:
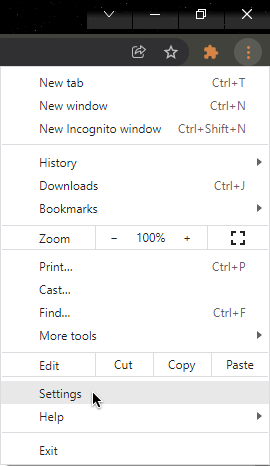
On the Settings tab, you can type “proxy” in the search tab and click Open your computer’s proxy settings. If you're reading this article in the far future and search in Chrome settings doesn't work, scroll to the Advanced sub-menu.
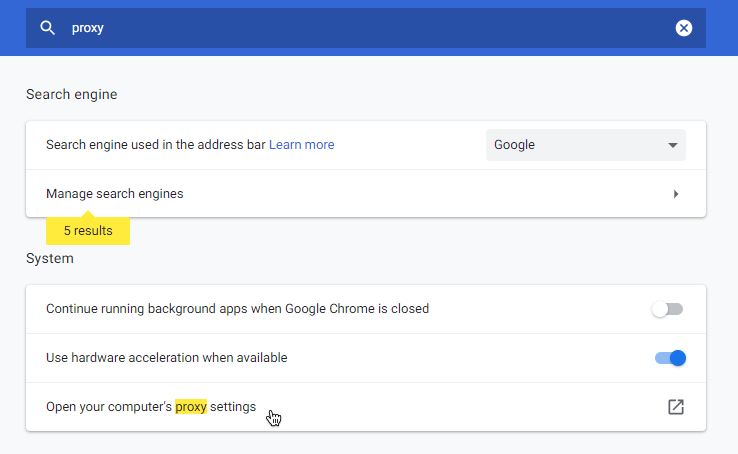
This will open your computer’s settings app where you can enter proxy server information: Turn Use a proxy server on and type the proxy address-port combo:
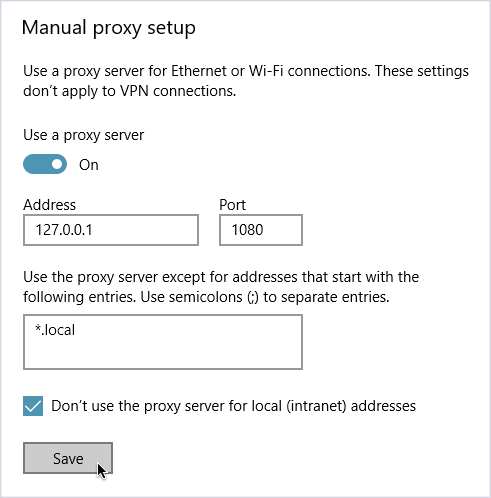
Notice the next field: Here, you can input a list of domain names and IP addresses to connect to without a proxy. For instance, if you don’t want to use proxies when connecting to
- infatica.io,
- 192.158. 1.38, and
- Any IP address that starts with 127,
Enter the following addresses and click Save:
infatica.io; 192.158. 1.38; 127.*;
Change proxy settings via command-line flags
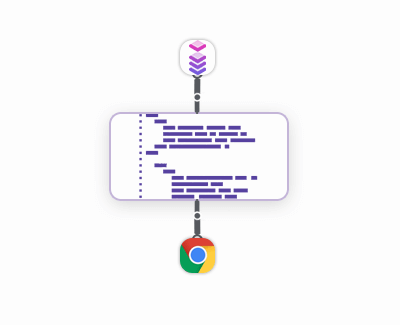
Command-line flags are small pieces of code that specify additional program options. Here are two flags for using a SOCKS5 proxy – replace proxied:1234 and proxied with your proxy server information:
--proxy-server="socks5://proxied:1234" --host-resolver-rules="MAP * ~NOTFOUND , EXCLUDE proxied"
On Windows, flags can be added via the Properties window:
- Quit Chrome.
- Right-click the Chrome shortcut and choose Properties.
- Append the flags to the Target window – it will look something like this:
"C:\Program Files\Google\Chrome\Application\chrome.exe" --proxy-server="socks5://proxied:1234" --host-resolver-rules="MAP * ~NOTFOUND , EXCLUDE proxied" - Click OK – now you can run Chrome with a proxy.
Enable Chrome proxy via FoxyProxy
Another method involves proxy managers – special software designed to simplify managing different proxy configurations through a single interface. FoxyProxy is a popular proxy manager that we can use to install a Chrome proxy – let’s see how to set it up.
Upon installing the extension, click its icon in Chrome toolbar, select Options:
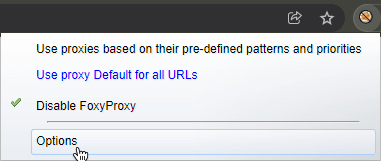
In the options menu, click Add new proxy to create a new proxy configuration:

Select the Proxy details tab and turn Manual Proxy Configuration on – this will allow you to enter the host/IP proxy address and port number. In our case, we’re using example.com and 59812 as a placeholder domain name and port, respectively.
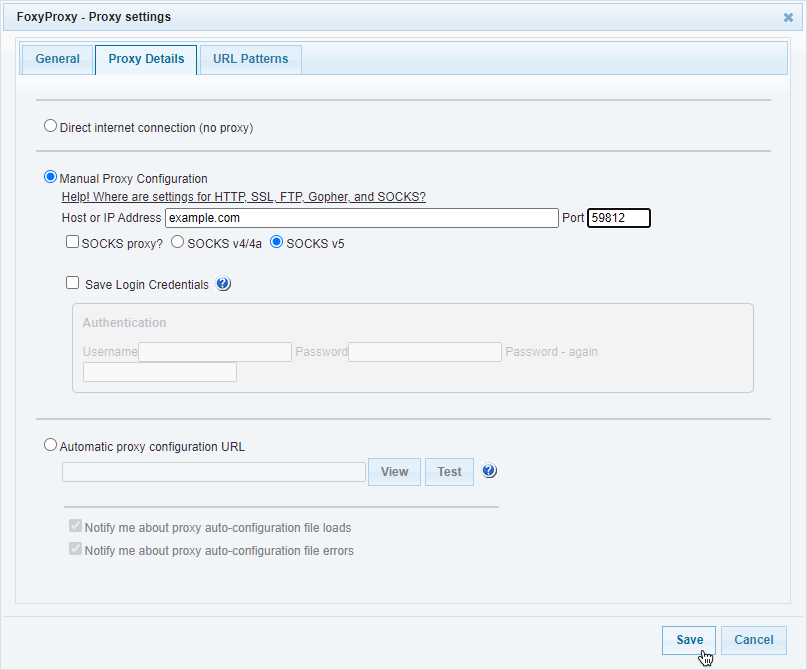
After clicking Save, you’ll return to FoxyProxy’s main option menu – choose Use proxy for all URLs to enable proxies in Google Chrome.

Benefits of using a Chrome proxy
In our IP addresses overview, we concluded that the IP address is an important facet of your online presence. Acting as your virtual address on the web, the IP holds a plethora of valuable information about its user:
- Geolocation (country, region, city, postal code,)
- Connection properties and technical data (ISP, network, route, operating system, web browser, etc.)
Better anonymity
When you’re surfing the web without protection (be it a VPN or a proxy), each website you visit can see your IP address – and all of its accompanying information we listed above. For instance, with your (general) whereabouts, it’s much easier for ad networks to show you targeted ads and nudge you into buying something.
Proxies hide your IP address, making it harder for various companies to bombard you with commercial offers and ads.
Improved security
Broadcasting your IP address poses another problem: Malicious third parties can use your IP to intercept the data you send over the internet. This is especially the case with public Wi-Fi hotspots in cafes, airports, or libraries – their open nature entails easy access both for regular users and hackers, who may try to steal your confidential data like logins, passwords, addresses, credit card details, and so on.
Proxies hide your IP address and can be configured to encrypt your web traffic, effectively becoming a light-weight VPN.
Troubleshooting Chrome proxy issues
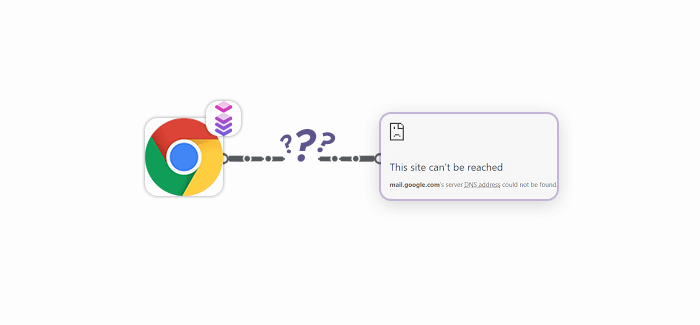
Even after following the installation instruction above to a T, you may have problems with getting proxy Chrome to work. These factors can sometimes prevent proxies from working correctly:
- Profiles: different Chrome profiles utilize different proxy settings.
- Proxy Google Chrome Extensions: Browser extensions can modify proxy settings.
- Proxy system settings can be changed by other software.
- Plugins (e.g. Java applets) can ignore proxy settings.
- Other Chrome components can bypass proxy settings and send requests directly.
- Open Chrome and click the three horizontal lines in the top-right corner of the window.
- Select Settings from the menu.
- Choose Advanced from the list on the left — a drop-down menu will appear.
- Click Open your computer's proxy settings — your system's proxy settings page will appear.
- Scroll down to the Manual proxy setup area to check your proxy configuration (address, port, exceptions, etc.)
On macOS, click the Apple logo to open System Preferences, select Network, choose Advanced → Proxies. From the list on the left, select a proxy configuration and deselect it.


