


Article content


Vlad Khrinenko
5 min read
If you want to automate web tasks and scrape data from websites, you need a tool that can simulate human actions and avoid detection. In this guide, you will learn how to use MuLogin, a powerful web automation and scraping tool, with Infatica, a reliable proxy service. You will learn how to get Infatica proxy details, install MuLogin, create a MuLogin profile, and check for leaks. By following these steps, you will be able to access the web from different locations, devices, and IP addresses, and automate and scrape any website without getting blocked.
What is MuLogin and how does it work?
MuLogin is a tool that lets you automate web tasks such as logging in, filling forms, clicking buttons, and extracting data from websites. It works by creating scripts that simulate human actions on web pages using a browser extension or an API.
You can use MuLogin to automate tasks such as checking your email, booking a flight, ordering a pizza, or scraping product reviews. You can also schedule your scripts to run at specific times or intervals, or trigger them with webhooks or Zapier. MuLogin supports various browsers such as Chrome, Firefox, Edge, and Opera, and can handle cookies, sessions, captchas, and redirects.
What are the benefits of using Infatica proxies with MuLogin?
The benefits of using Infatica proxies with MuLogin are that you can automate web tasks and scrape data from any website without being detected or blocked. Many websites use anti-bot measures to prevent automation and scraping, such as IP bans, rate limits, captchas, and honeypots.
By using Infatica proxies, you can change your IP address and location to avoid these measures and access the web as a real user. You can also access geo-restricted content and compare prices from different markets by using proxies from different countries and cities. Infatica proxies are fast, reliable, and secure, and offer a large pool of IPs to choose from.
Step 1. Get Infatica proxy details
To integrate Infatica proxies into MuLogin, you need to follow three simple steps: Get Infatica proxy details, install MuLogin and add proxy details, and check for leaks.
First, log in to your Infatica account and go to the My Services section. There, you will see the proxy package that you have subscribed to. Click on it and then click on the Generate Proxy List button. You will see a window where you can enter the proxy settings. Select the default proxy format, host:port:username:password. After you enter the settings, click on the Generate button. You will see a list of generated proxies. Keep this window open and move on to the next step.
Step 2. Install MuLogin and add Infatica proxies
Download MuLogin from the official website and launch it. There are three ways to set proxy information: by editing the configuration file, by clicking the icon in the quick operation, or by bulk importing proxy IPs. Here are the steps for each method:
Method 1. Editing the configuration file
- Go to
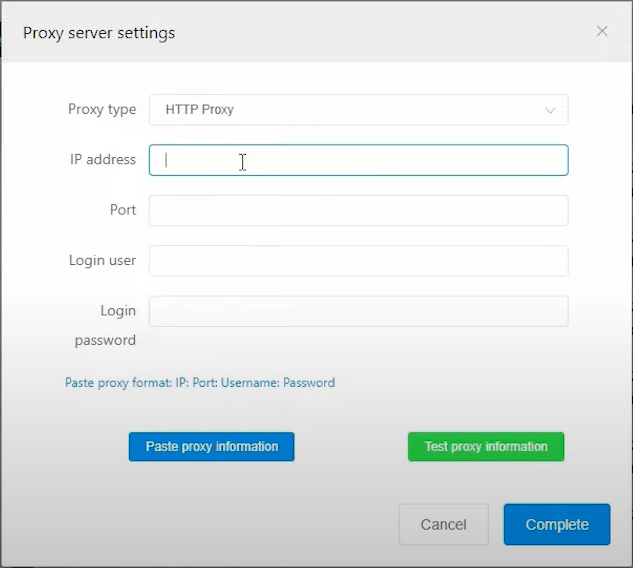
Add/Edit browser configuration file→Basic Configuration→Proxy settings. Select the proxy type, such as HTTP, HTTPS, SOCKS4, or SOCKS5. - Enter the proxy host, port, username, and password. The host and port are required, the username and password are optional.
- Click
Test proxy informationto check if the proxy is working. If it shows your IP details, it means the proxy is valid. - Save the settings.
Method 2. Clicking the icon in the quick operation
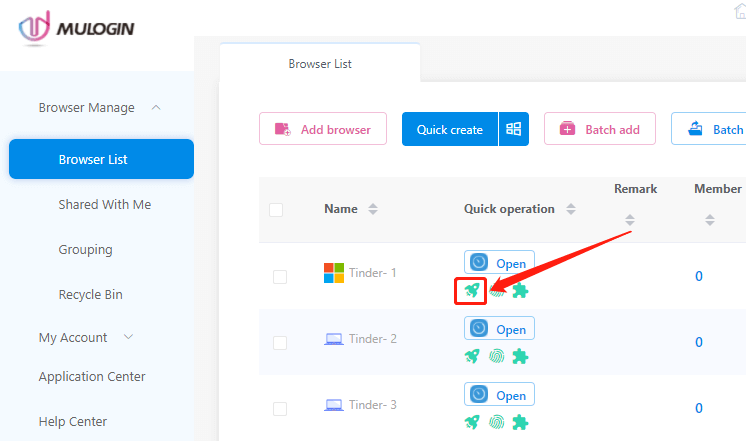
- Click the green rocket icon in the
Quick operationsection of the browser list. - Select the proxy type, such as HTTP, HTTPS, SOCKS4, or SOCKS5.
- Enter the proxy host, port, username, and password. The host and port are required, the username and password are optional.
- Click
Test proxy informationto check if the proxy is working. If it shows your IP details, it means the proxy is valid. - Save the settings.
Method 3. Bulk importing proxy IPs
Go to Batch import or export cookies/proxy IP information and follow the instructions there. You can import proxy IPs from a text file or copy and paste them from a source. You can also export your proxy IPs to a text file or copy them to another source.
The format of the proxy IPs should be host:port:username:password or host:port. The username and password are optional. After importing the proxy IPs, you can assign them to different browsers or profiles.
Step 3. Check for leaks
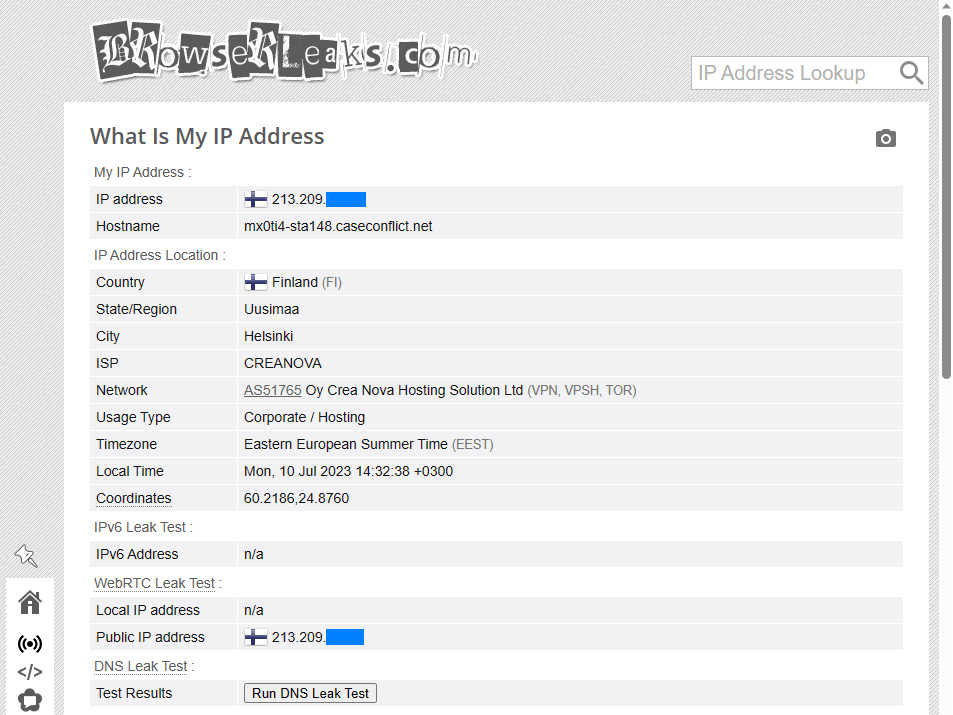
The last step is to verify that your proxy is working properly and not leaking any information. To do this, select browser profile(s), press the three-dot menu in MuLogin's menubar and select Open the browser. Then, visit a website that tests for leaks, such as browserleaks.com. This website will show you the IP address, location, and provider of your proxy. It will also show you other parameters that could reveal your identity, such as your browser fingerprint, WebRTC, and DNS. Make sure that everything matches your proxy settings and that there are no leaks.
Conclusion
In this guide, you have learned how to integrate Infatica proxies into MuLogin, a web automation and scraping tool. You have learned how to get Infatica proxy details, install MuLogin, create a MuLogin profile, and check for leaks. By doing this, you have gained the ability to access the web from different locations, devices, and IP addresses, and automate and scrape any website without getting blocked. You can use this skill to perform various web tasks such as logging in, filling forms, clicking buttons, and extracting data. If you have any questions or issues, you can contact the support teams of Infatica and MuLogin.
Frequently Asked Questions
Infatica proxies are residential, mobile, or datacenter proxies that allow you to access the web from different locations, devices, and IP addresses. You need them to bypass geo-restrictions, avoid captchas, and scrape data from websites without getting blocked.
You can integrate Infatica proxies into MuLogin by using the proxy settings in the browser extension or the API. You need to enter the proxy host, port, username, and password provided by Infatica. You can also choose the proxy type, country, and city.
You can test if the integration is working by running a script that visits a website that shows your IP address and location, such as whatismyipaddress.com. You should see the IP address and location of the proxy you selected.


