


Article content


Denis Kryukov
6 min read
Ghost Browser is a web browser designed specifically for productivity and efficiency, particularly for developers, marketers, and other professionals who need to manage multiple online accounts simultaneously. Its functionality can be supercharged by proxies – and in this article, we’ll show you how to optimize your browsing experience using Ghost proxy configurations.
For Windows
Ghost Browser is based on the Chromium engine, so configuring proxy settings is similar to other Chromium-based browsers. Here’s a step-by-step guide on how to edit proxies:
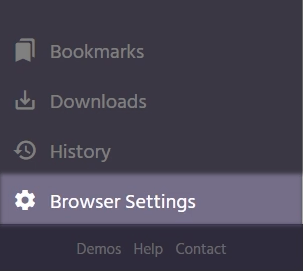
1. Access settings: Click Browser Settings on the bottom left menu. Alternatively, press the three vertical dots in the upper right corner of the browser window to open the menu. Select Settings from the dropdown menu.
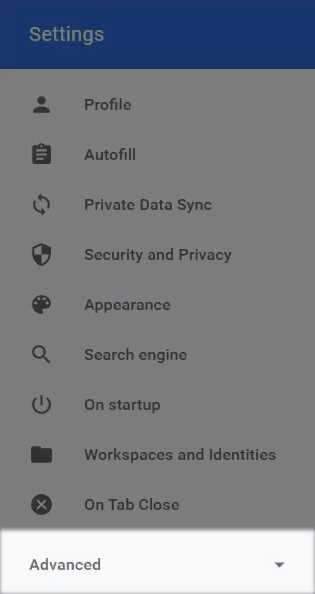
2. Open proxy settings: In the Settings menu, scroll down and click on Advanced to expand more options.
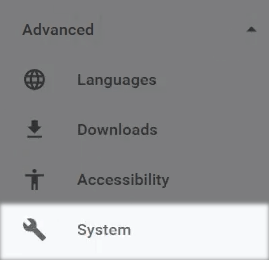
Under the System section, click on Open your computer’s proxy settings. (Alternatively, you can type “proxy” in the Windows search bar and open the Settings app from there.)
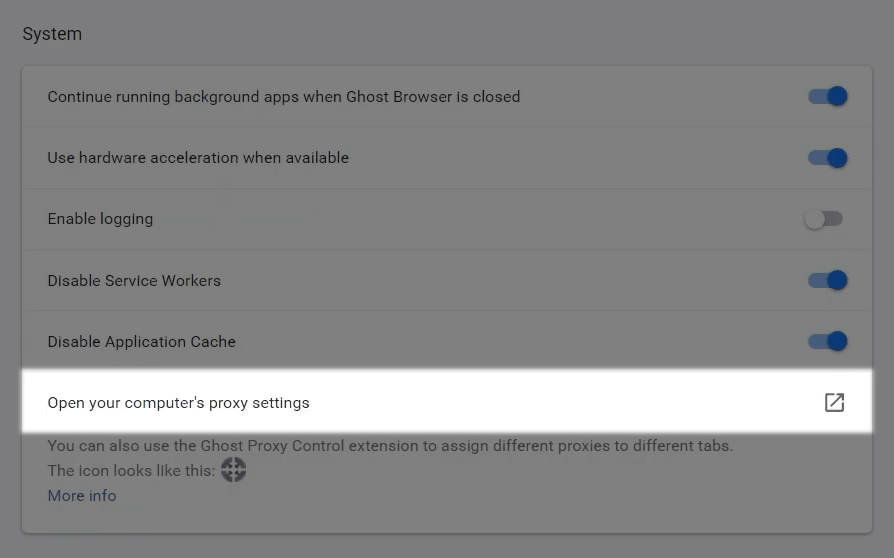
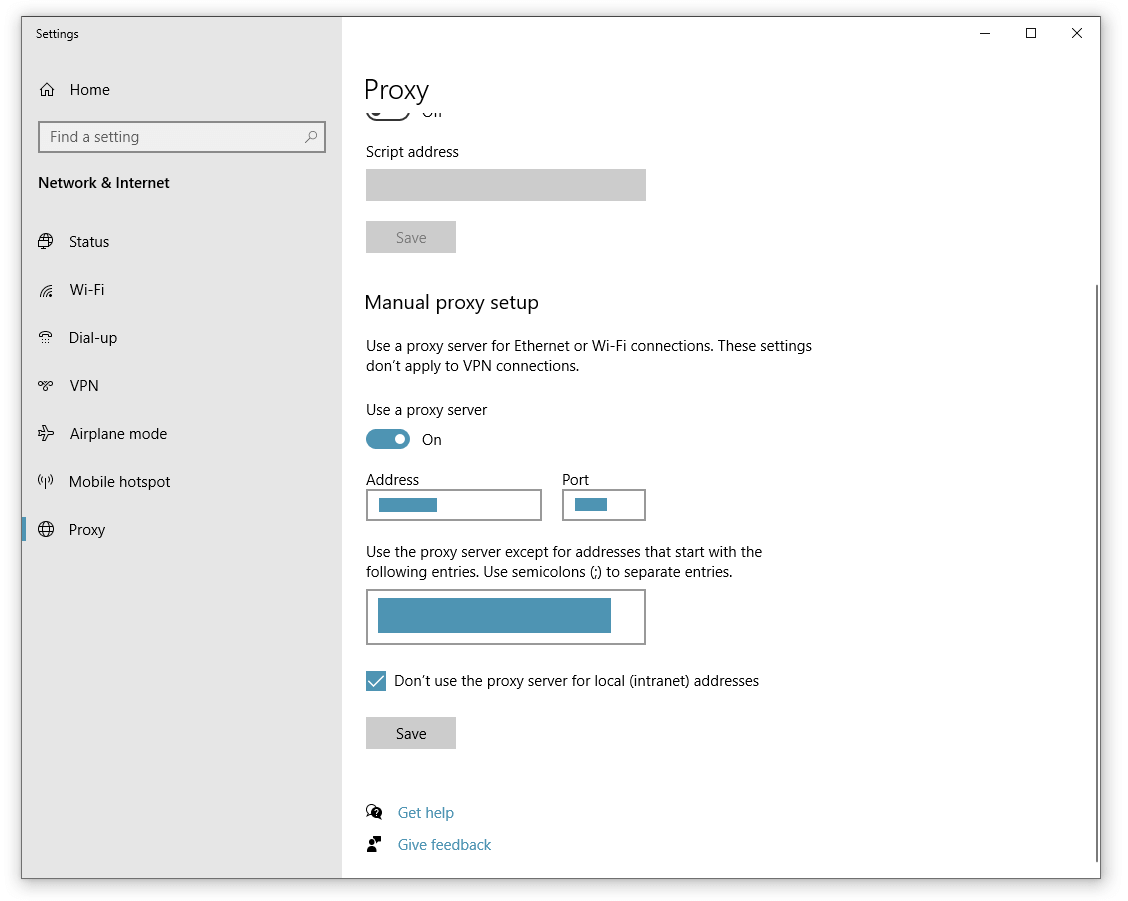
3. Configure proxy: This will open Windows proxy server settings. Here, you can perform the manual proxy setup and input the proxy server address and port number. If you need to configure specific types of proxies (HTTP, HTTPS, FTP, SOCKS), you can do so by entering the appropriate information in the provided fields. Apply the changes by clicking Save.
4. Restart Ghost Browser: To ensure that the new proxy settings take effect, restart the browser.
For macOS
1. Access Ghost Browser proxy settings: Click on the three vertical dots (menu icon) in the upper right corner of the browser window. Select Settings from the dropdown menu.
2. Open proxy settings: In the Settings menu, scroll down and click on Advanced to expand more options.
Under the System section, click on Open your computer’s proxy settings. This will open the Network settings of your macOS. (Alternatively, you can click the Apple icon, open System Preferences from the drop-down menu, and access network settings from there.)
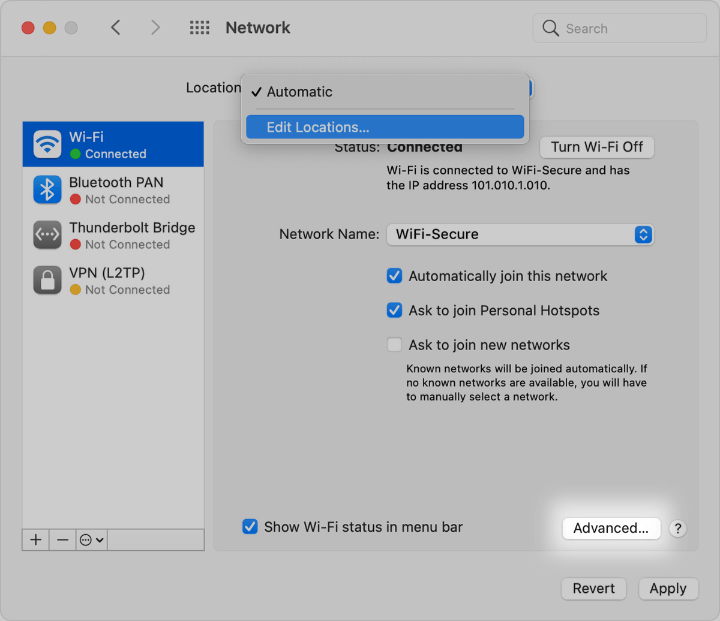
3. Configure network proxy settings: In the Network settings window, you will see a list of network services on the left. Select the active network connection (Wi-Fi, Ethernet, etc.) you are using. Click on the Advanced button in the lower right corner.
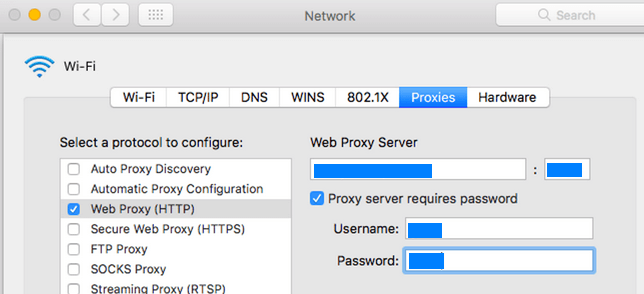
4. Enter proxy details: In the Advanced settings window, go to the Proxies tab. You will see various proxy options like Web Proxy (HTTP), Secure Web Proxy (HTTPS), FTP Proxy, and SOCKS Proxy. Check the box next to the type of proxy you want to configure. Enter the proxy server address and port number in the corresponding fields. If the proxy requires login credentials, check the Proxy server requires password box and enter your username and password.
5. Apply the changes: Once you have entered all the necessary proxy information, click OK to close the Advanced settings window. Click Apply in the Network settings window to save and apply your changes.
6. Restart Ghost Browser: To ensure the new proxy settings take effect, close and restart the browser.
Why choose Infatica’s residential proxies with Ghost Browser?
Choosing the right proxy service is crucial for maximizing the capabilities of your web browser, particularly when using a productivity-focused software like Ghost Browser – and Infatica proxies stand out as a top choice for several reasons:
Reliable and High-Quality Proxy Network
Infatica offers a robust and high-quality proxy list that ensures consistent and reliable connections. Their extensive pool of IP addresses minimizes the risk of downtime and ensures that your browsing experience remains smooth and uninterrupted. This reliability is essential for professionals who rely on Ghost Browser for managing multiple accounts and projects simultaneously.
Enhanced Privacy and Security
One of the primary reasons to use multiple proxies is to enhance online privacy and online security. Infatica residential proxies provide an additional layer of anonymity, protecting your personal information and online activities from prying eyes. When used with Ghost Browser, this ensures that your multiple sessions and workspaces remain secure, safeguarding sensitive data and credentials.
Access to Geo-Restricted Content
Infatica proxies offer a wide range of IP addresses from different geographical locations. This feature is particularly useful for marketers, researchers, and developers who need to access geo-restricted content or test applications from various regions. By using Infatica proxies with Ghost Browser, you can easily switch between different IP addresses and access the content you need without any restrictions.
User-Friendly Integration
Integrating Infatica proxies with Ghost Browser is straightforward and user-friendly. The process involves configuring specific proxy settings to use Infatica’s proxy servers. Infatica offers comprehensive support and documentation to guide users through the setup process, ensuring that even those with limited technical knowledge can easily configure their proxies.
Benefits of Ghost Browser
Multi-session browsing: This feature allows users to run multiple sessions within the same window. Each session is isolated, enabling you to log into several accounts on the same website simultaneously without interference. This is particularly useful for social media managers, developers testing different accounts, or anyone who needs to handle multiple logins.
Workspaces: Users can create different workspaces to organize their tabs according to projects. Each workspace saves the state of open tabs and sessions, which can be restored later. It helps in keeping work organized and saves time as you can quickly switch between different projects without reopening tabs or logging into accounts again.
Task management integration: Ghost Browser can integrate with project management tools like Trello, Asana, and others directly within the browser. This enhances productivity by allowing seamless workflow management and reduces the need to switch between applications.
Privacy and security: Ghost Browser emphasizes security with features like isolated sessions, secure connection protocols, and customizable Ghost proxy control. Enhanced security features protect your data and online activities, which is crucial for professionals dealing with sensitive information.
Chromium extensions: Since it's built on Chromium, Ghost Browser supports all Chrome extensions. Users can customize their browsing experience with a wide range of extensions available in the Chrome Web Store.
Frequently Asked Questions
It is designed for productivity, featuring multi-session browsing, workspaces, and task management integrations. Unlike standard browsers, it allows users to manage multiple accounts simultaneously and organize their work into project-specific workspaces.
Yes, it supports all Chrome extensions. Since it's built on the Chromium engine, users can access and install any extensions available in the Chrome Web Store, enhancing their browsing experience with additional functionalities.
It enhances privacy and security with isolated sessions, ensuring that activity in one session doesn’t affect others. Additionally, users can configure custom proxy settings for secure and private browsing, safeguarding their online activities and data.
Workspaces allow users to organize new tabs and sessions according to different projects. Each workspace saves the state of active tabs and sessions, enabling users to quickly switch between projects without losing progress, thus boosting productivity.
To configure Ghost control proxy settings, open Ghost Browser, go to Settings, and access the system's proxy settings under the Advanced section. Enter the proxy server details and save the changes. Restart the browser to apply the new proxy settings, ensuring secure browsing. Alternatively, you can use the Ghost proxy control extension.


