


Article content


Vlad Khrinenko
6 min read
The proxy ecosystem has a wide set of useful utilities that make working with the proxy settings a breeze. A good example of these utilities are proxy management tools – and FoxyProxy is arguably the most popular choice for this toolset. In this guide, we’re taking a closer look at FoxyProxy: We’ll explore its functionality and go through the installation steps, showing how to install and configure FoxyProxy for Google Chrome and Mozilla Firefox.
What is FoxyProxy?
FoxyProxy is a proxy management tool designed to simplify the process of configuring proxies. It utilizes URL patterns to route your web traffic via various proxy servers that you selected. It supports different proxies from any provider and a wide range of protocols, including HTTP(S), SSL, FTP, SOCKS4, SOCKS5, and more.
FoxyProxy’s proxy management features are available as a browser extension for Mozilla Firefox and Google Chrome; browsers like Safari, Microsoft Edge, Internet Explorer, Opera, and Vivaldi are unsupported.
Set up FoxyProxy for Google Chrome
FoxyProxy for Chrome is available in the form of FoxyProxy Standard and a number of third-party browser extensions. Install FoxyProxy Standard from the Chrome Web Store by clicking the Add to Chrome button and restart the browser.

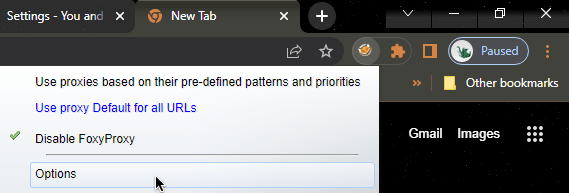
We can now begin to configure FoxyProxy. Click the FoxyProxy extension icon and select Options to open the main settings menu.
Press the Add New Proxy button to begin adding our new proxy configuration.
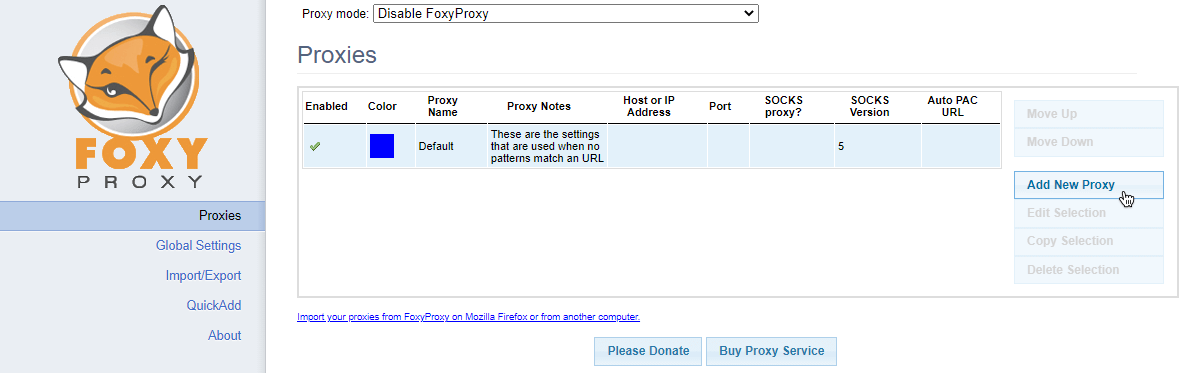
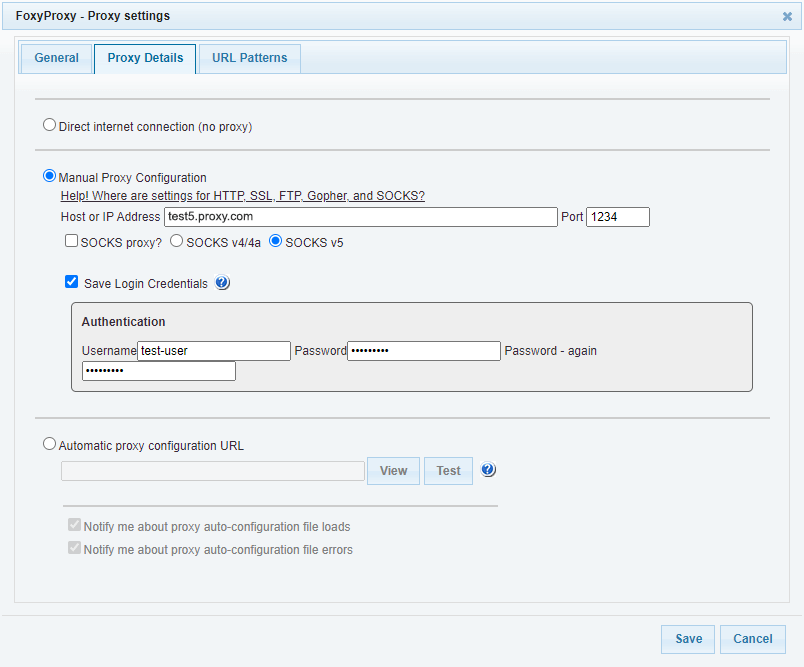
The Add Proxy window will open, where we need to specify the proxy settings for the following fields:
Host or IP address: paste the address from the proxy list (e.g.test5.proxy.com.)Port: paste the port number copied from the proxy list (e.g.1234.)
In some scenarios, you’ll need to use the username-password combination for authorization. Copy the login and password values from your proxy list – and paste them into the Username and Password fields. The password needs to be confirmed in the second Password field.
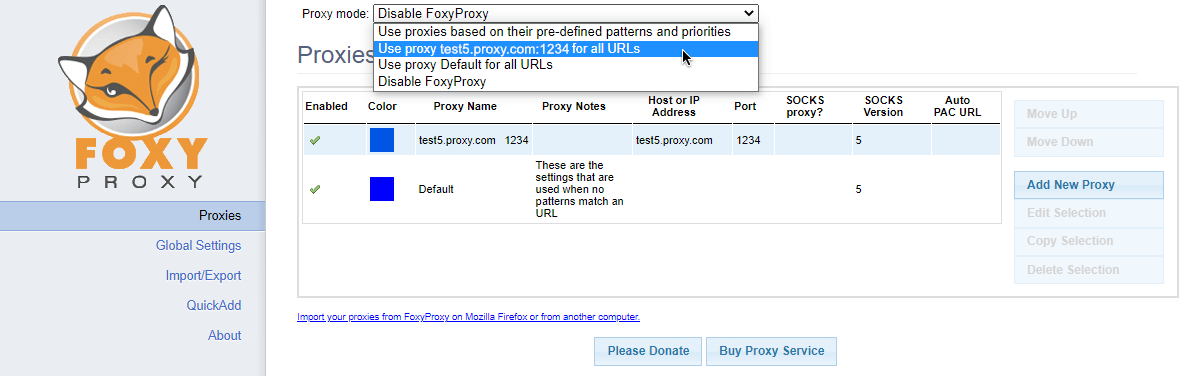
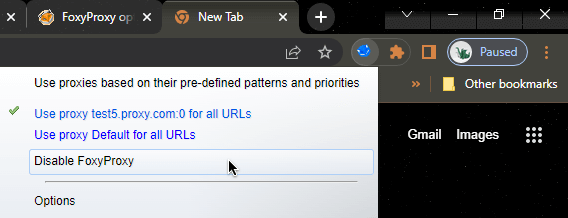
Click the Save button. To enable our new proxy configuration, select the Use proxy [your proxy address] for all URLs option in the Proxy mode drop-down menu at the top:
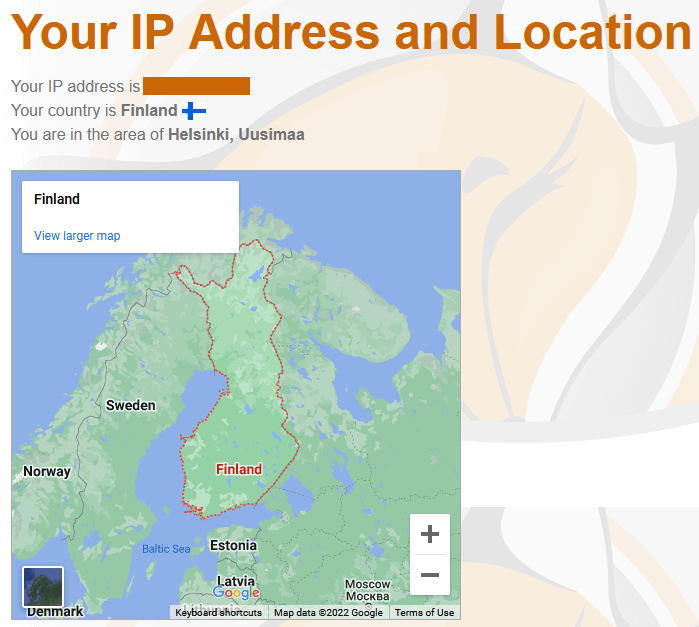
To test our new proxy setup, let’s open FoxyProxy’s IP address checker to see our new geolocation:
To disable FoxyProxy on Chrome, press the extension icon and select the Disable FoxyProxy option. Alternatively, select the Disable FoxyProxy option in the Proxy mode menu on FoxyProxy’s main settings page.
Set up FoxyProxy for Mozilla Firefox
FoxyProxy for Firefox is available in two versions: FoxyProxy Basic and FoxyProxy Standard. The Standard edition offers more useful features, so we’ll be using this version in our guide. As an alternative, you can try the Basic edition if you only need a barebones proxy switcher with an on/off toggle.
Install the FoxyProxy browser extension from the Firefox add-ons store by clicking Add to Firefox. Upon installing the extension, you’ll need to restart the browser.

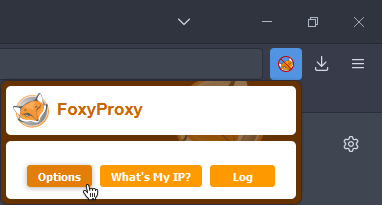
We can now perform the initial manual proxy configuration. In Firefox’s menu bar, click the FoxyProxy icon, press the Options button, – and the extension’s settings menu will open.
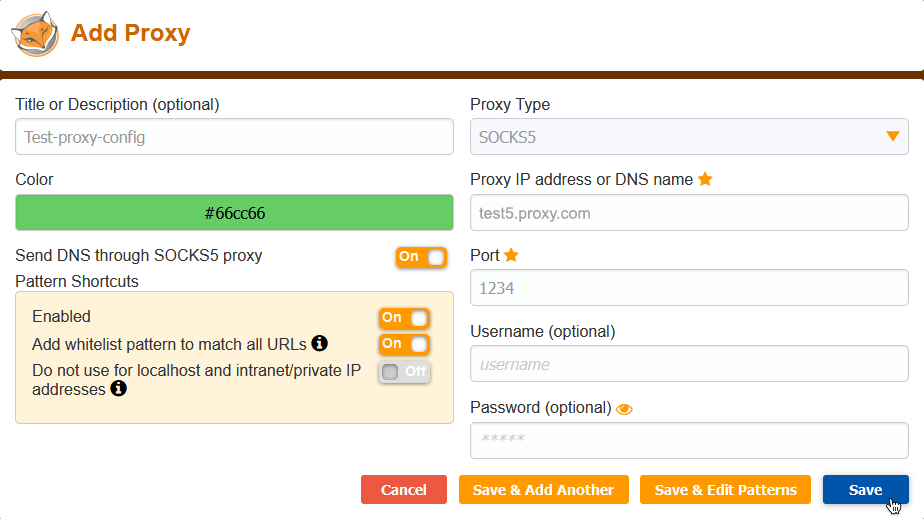
Click the Add button on the left to add a new proxy configuration. The Add Proxy window will open, where we need to fill in proxy details in the following fields:
Proxy Type: select SOCKS5.Proxy IP address or DNS name: paste the address from the proxy list (e.g.test5.proxy.com.)Port: paste the port (e.g.1234.)
In some scenarios, you’ll need to use the username-password combination for authorization. Copy the login and password values from your proxy list – and paste them into the Username and Password fields.
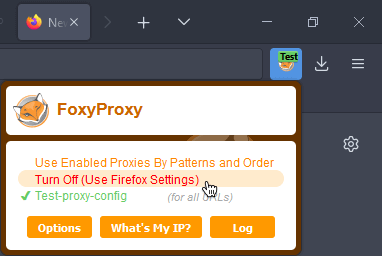
Click the Save button. Then, click the FoxyProxy icon and select your new proxy configuration – it should now be active. Let’s check that everything is working correctly: Click the FoxyProxy icon again and select the What’s my IP? button – you should now see a new IP address and location.

To disable FoxyProxy on Firefox, click the extension icon and select the Turn Off (Use Firefox Settings) option. Alternatively, switch the proxy configuration’s toggle to OFF in FoxyProxy’s main settings menu.
Android version: Additionally, FoxyProxy for Firefox can be installed on your Android device, supporting the same functionality as the desktop version.
What Benefits does FoxyProxy Offer?
Oftentimes, working with proxies requires some programming (or scripting, at least) skills: This may involve installing proxy certificates or using the terminal app to perform the initial setup. For many users, proxy management tools like FoxyProxy can save a lot of time: They provide an easy-to-use graphical interface that allows users to add proxy configurations in mere minutes – and switch between them with a click of a button.
What Should You Know When Using FoxyProxy?
FoxyProxy isn’t a free proxy service in and of itself – you’ll still need a proxy plan to use these browser extensions. A paid proxy plan will offer much better performance and reliability: With enormous user bases, free proxies are simply unable to provide adequate performance to all users.
Naturally, you could use a free proxy with FoxyProxy to have a quick look at a blocked website – but surfing the web for longer periods of time will only frustrate you with slow connection speed and constant disconnects.
Get the Best proxies for FoxyProxy
To use FoxyProxy to its full potential, you’ll need a reliable proxy – and Infatica can offer you the right one for the job. Our proxies’ key features include:
- 99,9% uptime and maximum performance,
- No CAPTCHAs and other roadblocks, and
- Tens of millions of household IPs in every country.
🏠 Learn more about Infatica's residential proxies.
📱 Learn more about Infatica's mobile proxies.
Conclusion
Managing proxy settings can be tricky: You need to juggle parameters like protocol, IP address, DNS name, port, username, and password – and in some cases, you need to update these parameters one by one. Thankfully, tools like FoxyProxy make proxy management easy: With features like profile synchronization, profile importing, and profile switching, staying connected to the web via proxies is easy. We hope this guide helped you and answered all of your questions!
Frequently Asked Questions
Try deleting FoxyProxy, closing the browser, and installing the extension again – this process should fix most of the errors. Alternatively, try clearing the browser cache: Open your browser’s settings and search for Clear browsing data (on Chrome) or Clear recent history (on Firefox.) Then, uncheck data you don’t want to remove (e.g. cookies) and leave the Cache field marked for deletion.
To change your IP and proxy settings, you need to configure FoxyProxy first: Add a proxy configuration that includes the IP address and the port and save it. Turn FoxyProxy on – and your IP should now be different.
The FoxyProxy browser extension for Firefox has two versions: Standard and Basic. The Standard version offers more features and proxy settings (e.g. advanced logging, synchronization, importing and exporting profiles, etc.), while the Basic one is a simple proxy switcher with an on/off toggle.


