


Article content

Denis Kryukov
8 min read
The internet is filled with data – product listings, reviews, job postings, news articles, and more. But most websites don’t offer this data in downloadable formats. That’s where web scraping comes in. Among the many tools available for web scraping, Python stands out as a popular choice thanks to its simplicity and rich ecosystem of libraries.
One of the most beginner-friendly tools in this space is BeautifulSoup – a Python library designed to parse HTML and XML documents with ease. In this guide, you’ll learn how to set up your Python environment for web scraping, extract specific elements from web pages using BeautifulSoup, handle pagination and common challenges, and more.
What Is BeautifulSoup?
BeautifulSoup is a Python library that makes it easy to navigate, search, and modify HTML or XML documents. Think of it as a tool that helps you break down a webpage’s structure and extract only the information you need – like product names, prices, article headlines, or links.
Under the hood, BeautifulSoup converts HTML into a parse tree, which you can explore using Python code. This lets you find specific tags, extract their content, and automate tasks that would otherwise take hours to do manually.
Why Use BeautifulSoup?
- It’s simple and intuitive – great for beginners.
- Works well with
requestsand other HTTP libraries. - Supports different parsers like
html.parser,lxml, andhtml5lib. - Helps you deal with poorly structured HTML (which is very common on the web).
Basic Example
Here’s how you can use BeautifulSoup to extract the title from a webpage:
from bs4 import BeautifulSoup
import requests

url = "https://example.com"
response = requests.get(url)
soup = BeautifulSoup(response.text, 'html.parser')

print(soup.title.text)
Behind the Scenes
requests.get()fetches the page’s HTML content.BeautifulSoup(response.text, 'html.parser')turns that HTML into a navigable object.soup.title.textgrabs the content inside the<title>tag.
As you can see, scraping with BeautifulSoup starts with just a few lines of code. But as websites become more complex – using JavaScript to load content or implementing anti-scraping defenses – you’ll likely need to enhance your setup with tools like rotating proxies or headless browsers.
Setting Up Your Environment
Before we dive into scraping websites, let’s get your Python environment ready. You’ll only need a few libraries to get started – mainly BeautifulSoup and Requests. Optionally, you can also install lxml, a faster parser for HTML.
Step 1: Install Required Libraries
You can install everything you need using pip. Open your terminal or command prompt and run:
pip install beautifulsoup4 requests lxml
Here’s what each package does:
beautifulsoup4: The main library for parsing HTML or XML.requests: A popular library for sending HTTP requests.lxml: A fast, robust HTML/XML parser (used by BeautifulSoup when specified).
💡 Tip: If you're using a virtual environment (recommended), make sure it's activated before running these commands.
Step 2: Check Your Python Version
BeautifulSoup works well with Python 3.x. You can check your version with:
python --versionIf you're using an older version (e.g., Python 2.x), consider upgrading to the latest stable release of Python 3 for better support and compatibility.
Extracting Data: Basic HTML Parsing
Once you’ve fetched a webpage using requests and parsed it with BeautifulSoup, the next step is to extract specific pieces of data – headings, links, prices, and more. BeautifulSoup provides intuitive methods to find and extract HTML elements, even from messy or deeply nested markup.
Understanding HTML Structure
Here’s a simplified HTML snippet you might encounter:
<html>
  <body>
    <h1>Welcome</h1>
    <div class="product">
      <h2 class="title">Smartphone</h2>
      <span class="price">$499</span>
    </div>
  </body>
</html>
Let’s walk through how to extract this content using BeautifulSoup.
Accessing Tags
You can access elements directly by tag name:
print(soup.h1.text) # Outputs: Welcome
Using find() and find_all()
These methods let you search for elements by tag name and attributes:
# Finds the first div with class "product"
product = soup.find("div", class_="product")

# Finds all span tags
prices = soup.find_all("span")
You can chain operations to extract nested values:
title = product.find("h2", class_="title").text
price = product.find("span", class_="price").text

print(title)  # Outputs: Smartphone
print(price)  # Outputs: $499
Using select() for CSS Selectors
You can also use CSS-style selectors with select() and select_one() – this is especially handy when elements don’t have clear tags but do have unique classes or IDs.
# Find the product title using a CSS selector
title = soup.select_one(".product .title").text
Extracting Attributes
To get an attribute like an image URL or a link (href), use .get():
link = soup.find("a").get("href")
Cleaning the Output
Most scraped text includes unwanted whitespace or newline characters. Clean it using .strip():
clean_text = soup.h1.text.strip()
Putting It All Together
from bs4 import BeautifulSoup
import requests

url = "https://example.com"
response = requests.get(url)
soup = BeautifulSoup(response.text, "lxml")

product = soup.find("div", class_="product")
title = product.find("h2", class_="title").text.strip()
price = product.find("span", class_="price").text.strip()

print(f"{title} - {price}")
Handling Pagination and Loops
Scraping a single page is great for learning, but real-world data often spans multiple pages – like product listings, job boards, or search results. To collect full datasets, you’ll need to loop through paginated content.
Understanding Pagination
Many websites include a pattern in their URLs to load different pages. For example:
https://example.com/products?page=1
https://example.com/products?page=2
https://example.com/products?page=3
In such cases, you can build a loop that modifies the page number and repeats the scraping process.
Example: Looping Through Pages
from bs4 import BeautifulSoup
import requests

base_url = "https://example.com/products?page="
for page in range(1, 6):  # Scrape pages 1 to 5
    url = base_url + str(page)
    response = requests.get(url)
    soup = BeautifulSoup(response.text, "lxml")

    products = soup.find_all("div", class_="product")
    for product in products:
        title = product.find("h2", class_="title").text.strip()
        price = product.find("span", class_="price").text.strip()
        print(f"Page {page}: {title} - {price}")
This code will:
- Loop through pages 1 to 5
- Fetch each page’s content
- Extract product titles and prices
- Print the results
Finding the Next Page Dynamically (Optional)
Some websites don’t use query strings in their URLs. Instead, they include a “Next” button in the HTML. You can extract the link dynamically like this – and you can then loop through pages until no “Next” link is found.
next_link = soup.find("a", text="Next")
if next_link:
    next_url = next_link.get("href")
Throttle Your Requests
Rapid scraping can overwhelm servers and get your IP blocked. Add a short delay between requests:
import time
time.sleep(2)  # Pause 2 seconds between requests
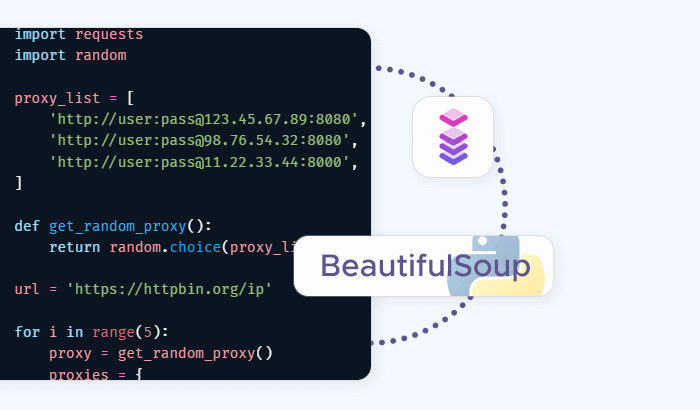
Using BeautifulSoup with Proxies
As you start scraping more data or accessing geo-restricted content, you may run into issues like getting blocked after too many requests, receiving CAPTCHA challenges, or seeing different content based on your IP location. To overcome these limitations, developers use proxies – intermediary servers that route your traffic and mask your IP address. In Python, you can easily integrate proxies into your requests + BeautifulSoup workflow.
How Proxies Work
When you use a proxy, your request doesn't go directly to the target website. Instead, it first passes through the proxy server, which forwards the request on your behalf. The website sees the proxy’s IP address – not yours. This is useful for rotating IPs to avoid rate limits, geo-targeting (e.g., scraping content as if you were in the US, UK, or Asia), and increasing anonymity when collecting public data.
Adding a Proxy to Your Requests
To add a proxy to your request, pass a proxies dictionary to the requests.get() function:
proxies = {
    "http": "http://username:password@proxy.infatica.io:port",
    "https": "http://username:password@proxy.infatica.io:port"
}

response = requests.get("https://example.com", proxies=proxies)
soup = BeautifulSoup(response.text, "lxml")
Replace username, password, proxy.infatica.io, and port with your actual Infatica proxy credentials.
Rotating Proxies Automatically
For larger scraping tasks, rotating proxies between requests is ideal. With Infatica, you can:
- Use a rotating proxy gateway (one endpoint that rotates IPs for you)
- Or manually switch between IPs in your script (more advanced)
A basic loop with proxy support might look like:
urls = ["https://example.com/page1", "https://example.com/page2"]

for url in urls:
    response = requests.get(url, proxies=proxies)
    soup = BeautifulSoup(response.text, "lxml")
    # extract data...
To fully automate rotation, you could manage a pool of proxies and switch between them in code – or rely on Infatica’s automatic rotation options.
Handle Proxy Errors Gracefully
Sometimes, proxies can time out or fail. Always use try/except blocks to handle failures and retry logic:
try:
    response = requests.get(url, proxies=proxies, timeout=10)
    response.raise_for_status()
    soup = BeautifulSoup(response.text, "lxml")
except requests.exceptions.RequestException as e:
    print(f"Request failed: {e}")
Try It with Infatica
Infatica offers high-quality residential and datacenter proxies, along with rotating IP gateways, global coverage across 190+ countries, authentication via username/password or IP whitelisting, and much more.
Whether you're scraping ecommerce listings, travel prices, or SERP results, proxies can give you the consistency and flexibility you need.
🔗 Learn more about Infatica Proxy Services
Cleaning and Saving the Data
Once you’ve extracted the content you need, the next step is to clean and organize it. Web pages often contain extra whitespace, inconsistent formatting, or embedded characters that aren’t useful. After cleaning, you’ll want to store the data in a structured format like CSV or JSON for analysis or reporting.
Cleaning the Data
BeautifulSoup makes it easy to extract text, but the raw output might look messy. Here are a few techniques to tidy things up:
Remove whitespace and newlines: Use .strip() to clean leading/trailing whitespace:
title = product.find("h2").text.strip()
Replace special characters: Use Python’s replace() or regex to remove unwanted characters:
price = price.replace("$", "")
Normalize formatting: You can use .lower() or .title() to standardize casing:
title = title.lower()
Saving to CSV
CSV (Comma-Separated Values) is great for storing tabular data.
import csv

data = [
    {"title": "Smartphone", "price": "499"},
    {"title": "Laptop", "price": "899"},
]

with open("products.csv", "w", newline="", encoding="utf-8") as file:
    writer = csv.DictWriter(file, fieldnames=["title", "price"])
    writer.writeheader()
    writer.writerows(data)
You can append to this list dynamically while scraping:
products = []

# Inside scraping loop:
products.append({
    "title": title,
    "price": price
})
Saving to JSON
If you’re working with nested or non-tabular data, JSON is a good alternative. It’s particularly useful if you plan to use the data in web apps or APIs later.
import json

with open("products.json", "w", encoding="utf-8") as file:
    json.dump(products, file, indent=2)
Quick Output Preview
Want to inspect your data before saving? Use print() or pprint:
from pprint import pprint
pprint(products)
Handling Encoding Issues
Some websites use different encodings. You may occasionally need to set:
response.encoding = "utf-8"
Or specify encoding when saving files.
Frequently Asked Questions
BeautifulSoup is a Python library used to parse and navigate HTML or XML documents. It helps extract data from web pages by allowing developers to search, filter, and manipulate tags easily.
Not always. For small-scale or low-frequency scraping, proxies may not be necessary. But if you're scraping many pages or geo-restricted content, proxies help avoid blocks and maintain consistent access.
No, BeautifulSoup can only parse static HTML. To scrape JavaScript-rendered pages, you’ll need tools like Selenium, Playwright, or access APIs directly when available.
Web scraping is legal in many cases, especially for publicly available data. However, always review a site’s terms of service and robots.txt file, and avoid scraping private or copyrighted content.
You can save scraped data using Python’s built-in libraries – like csv for spreadsheets and json for structured data. This allows for easy analysis, reporting, or integration into other tools.


